In the project workspace catalogue Samples/Table, you will find an assembly model Table.iam upon which this tutorial is based.
First, open the model Table.iam. If the installation of Woodwork for Inventor was set as default, in the top menu bar you will see a Woodwork Design tab containing commands used for wooden product design:

First, copy the assembly and assign codes to the assembly and its parts.
To start copying, click "Assembly Copier" button.
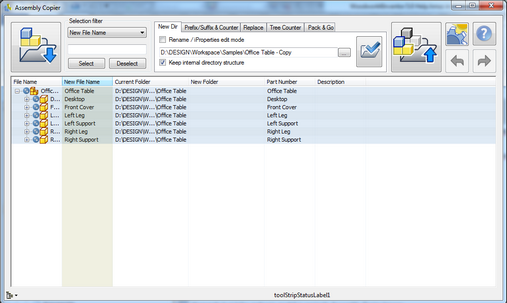
It will take a few seconds to copy the model. You then will see the Assembly Copier control window.
|
Place the cursor on the column title Part Number and click the right mouse button. The column should change its color, indicating that the Part Number column is currently active. After clicking the right mouse button, a context menu will appear. Select "Copy values to" –> "Description".
Once this operation is completed, you will see that the Part Number field values are transferred to the Description field values. |
For the Assembly Copier specify the location where the table model will be copied. Select New Dir tab and click the catalogue search and creation button.
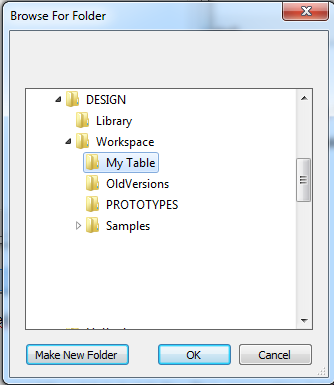
A standard Windows catalogue specification and creation window will appear.
Create a catalogue in the project’s workspace in which you want to place your assembly (e. g. My Table), and click “OK”. You will see that the copying location changes to the newly specified catalogue.
|
In the window showing the assembly structure, place the cursor on the column entitled New File Name and activate it by clicking the right mouse button. Go to the top Tree Counter tab.
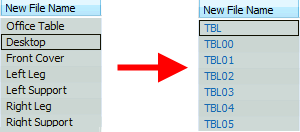
In the Root name field, enter “TBL” (abbreviation for table) and click “Apply tree counter”. After this operation you will see that the New File Name values are renamed based on a relevant order number in the presented assembly structure tree.
Repeat the field value copy procedure, only this time copy New File Name values to Part Name values.
|
Start the copy command.
A dialog box will appear displaying the copy content. In this dialog box, click “Execute copy”. After the copying process is successfully completed, a window will appear. Check “and close Assembly Copier” and click “Open copy in Inventor”.
The newly copied assembly will be opened in the Autodesk Inventor environment. You may close the original assembly.
|
To make further work more convenient, change the browser nodes for more convenient navigation. To achieve this, start the add-on command Nodes: Woodwork Design –> Visibility Control –> Nodes
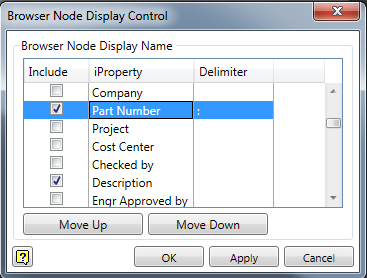
Set the data content visualized in the node in the dialog box. Let’s assume you want to see Part name and Description field values separated from each other by the ":" character.
Click the "Apply" button. In the side browser you will see renamed node names. To save the newly created copy, click "Ctrl+S". |


