The location for copying is indicated in the New Dir tab.
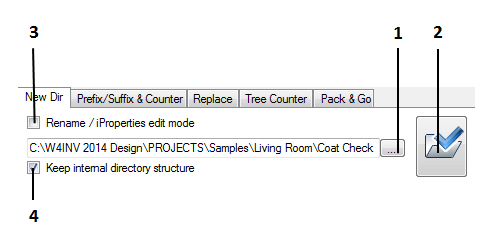
1. The button allowing the user to open a standard command for specifying the destination path on the computer. At the same time, the user may create a new Directory here where the copy of the assembly to be copied is planned to be placed.
2. By clicking on the button, the specified path is applied to all components selected for copying.
3. Rename/iProperties edit mode – switch over to the Rename/iProperties editing status. By checking the box, the copying program switches to the rename status. This means that components will be renamed but not copied. After switching over to this status, you will notice that the path indication function becomes inactive. If the assembly was opened from the Autodesk Inventor environment, you will receive a warning:
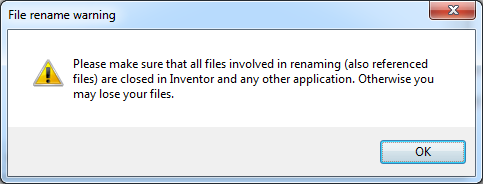
Important! This means that once the renaming operation is complete and when you are closing the file in the Autodesk Inventor environment, do not, by any means, try to save the current assembly or any assembly sub-component on the disc because this will irrevocably damage your assembly file. After the Assembly Copier has completed the task, simply close the assembly opened for copying without saving it. Then you can reopen this renamed assembly in the Autodesk Inventor program.
4. Keep internal directory structure - a request to retain the catalog structure during copying if the components of the assembly being copied are placed in sub-catalogs.