To open the part clamping command, go to:
Woodwork CAM -> Clamping ![]()
This will start the command for setting the clamping of the part to the worktable of the machine.
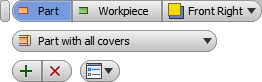
In the top row of the dialog window, a drop-down options list can be opened where you can select the workpiece status at the time of clamping it to the machine. Click here for more information. The following options are available:
|
|
Switch to Workpiece Options Selector |
|
|
Workpiece |
|
|
Workpiece with oversize |
|
|
Workpiece with Oversize and Top-Bottom Covers |
|
|
Workpiece with Top-Bottom Covers |
|
|
Workpiece with Oversize and Sizing Allowance* |
|
|
Workpiece with Oversize Sizing and Top Bottom Covers* |
|
|
Switch to Part Options Selector |
|
|
Part without covers |
|
|
Part with all covers |
|
|
Part without bottom and top covers |
|
|
Part without side covers |
|
|
Left front clamping corner is selected |
|
|
Right front clamping corner is selected |
|
|
Left back clamping corner is selected |
|
|
Right back clamping corner is selected |
* Important!
| ▪ | This type of clamping is available only for parts with workpieces that have a sizing oversize. |
| ▪ | Sizing is only possible with this type of clamping. |
| ▪ | Once the sizing is performed, the option of clamping with sizing oversize is no longer available. |
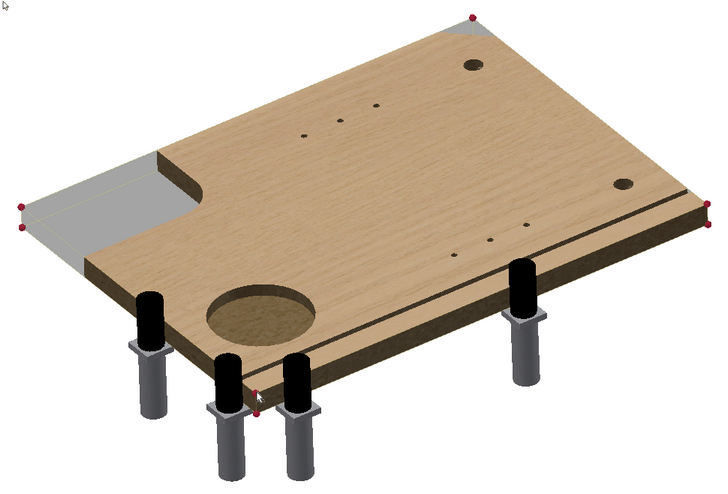
Depending on the selected status, the graphic view will display the shadow of the workpiece to be clamped in yellow lines and small spheres at the corners representing potential clamping points (see fig. below). If you move the cursor over the sphere and press the left mouse button (LMB), the given corner will be selected as the base corner. In this corner, a phantom of the clamping elements of the machine will be displayed. Before you click the command button ![]() "Apply”, you can select any other corner of the part for clamping.
"Apply”, you can select any other corner of the part for clamping.
By clicking the "Apply" button, a clamping node will be created in the side browser, and this clamping will become the current one. All processing operations to be created will belong to this clamping until a different clamping node, if any, is activated.
One should bear in mind that the CAM processing of the part may have one, two or more clampings. When creating CAM technological operations, only one clamping may be active. All operations that are being created apply to the active clamping. If no clamping is active, all commands for creating operations are inactive (Grey buttons). You can activate any clamping by simply placing the cursor on the clamping node in the side browser and double-clicking the left mouse button (LMB). The active clamping and its operations will be highlighted with a white background. Meanwhile, other clampings will be displayed in the Grey background.
Clamping visualization and control in the side browser
Once the clamping has been created, a node will appear in the side bar (see fig. below). Five main working planes will be immediately created within the clamping node.
| ▪ | Top |
| ▪ | Front |
| ▪ | Back |
| ▪ | Left |
| ▪ | Right |
Processing operations can be created with respect to these planes. If the operation requires a different orientation that the one in the provided plane, a Custom plane can be created.
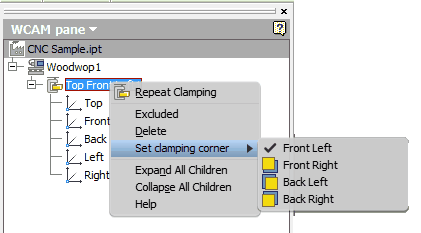
A clamping node has a context menu which can be opened by placing the cursor on the node and clicking the right mouse button (RMB). The following editing options are available here:
Excluded |
Excludes the given clamping from the CAM technology. All operations under this clamping are also excluded.
|
|
Delete |
Delete the given clamping.
|
|
Set Clamping corner |
Set the clamping corner. For a more detailed description, click here. |
|
Available corner options: |
||
|
||
|
||
|
||
|