The command is used to assign notes to holes in a 3D part model.
To open the command, go to:
Woodwork Design->Hole Note->Apply to Hole ![]()
Note. The command can be opened only in the part design environment.
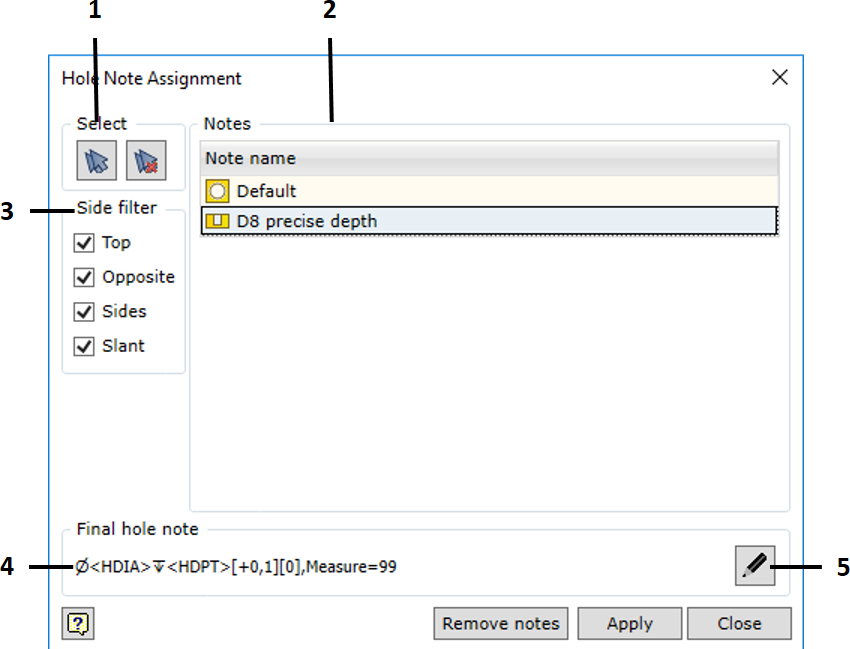
| 1. | Commands are used to create a set of all holes. For more detailed information about creating sets of holes, see the description below. |
| 2. | List of the existing hole note templates. The user has to select a note so that it can be assigned to the selected holes. |
| 3. | Hole filtering by the orientation of the hole in the part. |
| 4. | Content of the assigned hole. |
| 5. | Opening the hole content editor. For more information about hole note editing, see the description below. |
| ▪ | Remove notes – removes notes previously assigned to the holes in the set. |
| ▪ | Apply – applies the selected note to the selected holes. |
As already mentioned above, hole note templates also serve as a filter, when it is necessary to select the holes for which the note was created. When selecting different notes, different combinations of holes to which the note can be assigned will be displayed in the part.
 Different note filters display different sets of potentially selected holes
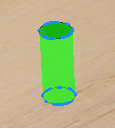
As the images show, once the note is selected, all holes in the part are highlighted using different color:
If you have several notes with different filtering criteria, you will see how the composition of holes suitable and unsuitable for noting changes as you switch between different notes.
Once you have selected a note, you have to create a set of holes to which the note will be applied. Blue frame highlighting the green hole shows that the hole is included in the set.
There are several ways to include holes in a set:
Additional options for creating a set
The user can additionally enable/disable holes depending on the side of part on which they are located:
To make it easier for the user to identify the top and bottom of the part, top and bottom symbols are displayed at the centre of the part when the command is used:
|

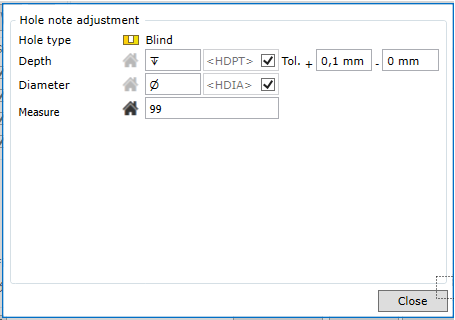
Here, you can edit all the fields that make up the contents of the note.
Important! The note manager does not provide the possibility to edit notes that have already been applied. To edit the note that has already been applied:
|